So long as the concept of digital marketing has existed, so has A/B testing.
The idea is simple: you create two variations of the same offering with one difference between them. You send half of your leads to one variant, and the other half to the second. Whichever variant converts the most leads into paying customers is the winner.
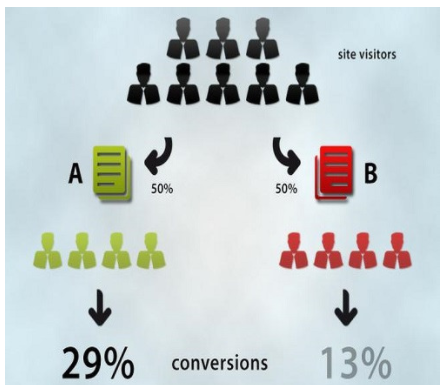
The basic principle of A/B testing is to split your visitors in half, and see how the two groups react to changes in your offering. (source)
I know what you’re thinking: “How can A/B testing get my app more downloads?”
Although A/B testing has had its place in website marketing, it’s just as applicable to mobile apps. In fact, A/B testing the app icon alone has shown to improve conversion by +30%.
In this article, we’ll be taking a look at what, and how to A/B test on your iOS or Google Play app store pages so you can do it all on your own.
What should I test?
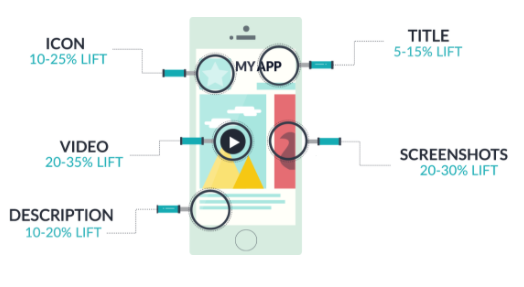
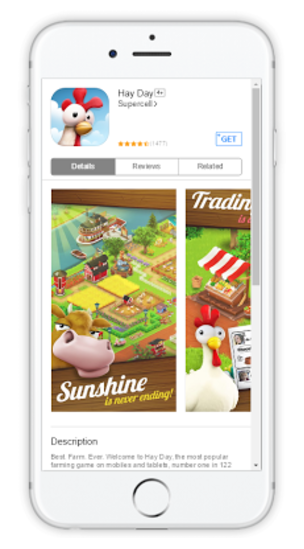
While the features you can A/B test will vary depending on the tool you’re using, the main ones include the:
- Icon
- Screenshots
- Title
- Video
- Description
Check out this graphic from Store Maven showing the average impact each factor can have on conversion.
If you’re wondering what exactly to test with regard to these elements, consider some of these ideas:
- Order: Should the first line of your description say “#3 Trending App on Android and iOS App Stores” or should it say “Rated #1 by X Magazine”?
- Color schemes: Is there a particular color you should use that will help sell your app?
- Arrangement: Should your screenshots be in portrait or landscape?
You’ll be asking the same questions any A/B tester does. Which color/font/wording sells the best? (source)
How do I A/B test?
Before deciding which method to test with, we need to distinguish between the two main stores:
The Google Play Store offers its own built-in tool for split testing: Google Experiments. This allows you to run A/B tests from within the Google Play Console, without having to worry about any third party solutions.
The Apple App Store does not offer its own split testing tool. This leaves you with two main options:
- Split test on interfaces other than your app store page, such as testing with your your app’s website landing page.
- Use a third party software to create a “fake” app store that emulates the feel of the Apple or Google Play store.
Let’s split these methods up into three different groups and take a look at each one individually.
1. Google’s built-in A/B tests (Android only)
If you’re app is only available for Google Play, using Google’s designated A/B testing tool should be your go to option.

Instabridge used Google Experiments to increase their conversion rate by over 30%. (source)
The biggest benefit of Google’s Experiments is that you can run tests on the real prospects who reach your app page. This means you’ll be getting the most accurate results.
With Google Play Experiments, you can run up to five localized tests at one time in any language. To run a test with Google’s built-in Experiments tool, check out their full guide here.
2. Split test using your app landing page
If your app is only available for iOS, consider running split tests on other branding material, like your website.
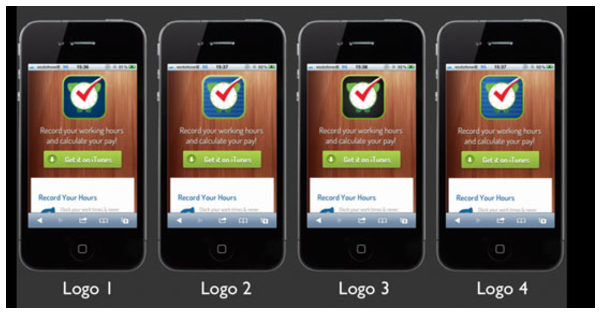
For example, let’s say your app’s website features an icon at the top of the page. You can use a service like Optimizely to test different variations and measure which one converts the best.
Here’s how it would look on mobile:
Once your split test is set up, you run a Facebook Ads campaign to drive traffic to the site and collect conversion data for each icon.
While running a website test like this can be cheap and easy, the results may skew since the website layout looks different than the app store page.
3. Running split tests on “fake” store pages
With this method, you’ll be using a service like Storemaven or Split Metrics to create landing pages that mimic the appearance of either the Apple or Google Play store. The goal of this is to run split tests without taking away the authenticity of an app store page.
This “fake” app store created by testing tool SplitMetrics could fool anyone.
While these websites have their own guides to creating a “fake” store A/B test, the general process looks like this:
- You enter your app’s name or URL into the software, allowing the tools to scrape together a mock app store page.
- You make changes to the variables you wish to test (i.e. the icon or screenshots).
- The service generates two new landing pages, one of each variation. These are hosted on separate webpages designed to mimic the feeling of the Apple or Google Play stores.
- You send equal quantities of traffic to these store pages using Facebook Ads (or any traffic source of your choosing).
- The users interact with the page as they would on the real store and their actions are recorded.
When the test reaches a 95% level of significance, you then hop back onto your tool’s dashboard to see which variations performed the best. If one variation had better results than the other, you’ll know what to change in your next release to the real Apple or Google Play store.
As an example, consider Split Metric’s rework of Bubble Birds 4. By changing the app’s screenshots to highlight experience instead of listing features, 32% more users clicked to install.
Final thoughts
As you can see, even small changes to the app store page can have a big impact on your conversion rates. For that reason, you’ll want to make sure you test as much as possible and leave little to chance.
If your app is on Google Play, there’s no reason to not be constantly testing. Since it’s free, you have nothing to lose except the time and resources it takes to make the changes. Even if you can’t create new designs on a regular basis, what’s stopping you from making little changes like to the first line of your description? If your app is only on iOS, you can still run tests using one of the methods I mentioned above although it will definitely cost more.
At the end of the day, it’s up to you to decide how much money and time to spend on testing. My advice would be to calculate the expected ROI for each test before committing the resources to running it.
For example, let’s say your app makes $5,000 per month and you’re thinking about creating and testing a new set of screenshots. Assuming that the improved screenshots will increase the conversion rate by around 10%, the ROI works out to an extra $500 per month, all else being equal. If the extra $500 per month is worth the effort of your design team, then go for it. If not, focus your resources somewhere else (like on one of these 108 app marketing strategies).
Another thing to keep in mind is that if you’re app is growing, the effect of the test can be amplified in the future. While a 10% increase in conversion means an extra $500 per month today, it could mean an extra $5000 per month in a year’s time.
